Implement verifyLogin and getFullname
1 | /** |
Make search result aware of favorite history
1 | /** |
What’s Cloud Computing
Cloud computing is the delivery of on-demand computing resources—everything from applications to data centers—over the Internet on a pay-for-use basis.
Since 2006 when Amazon introduced the Elastic Compute Cloud
Features:
- scalability,
- flexibility,
- on-demand,
- reduced labor cost and data center cost, handled by SREs
Bad
- data safety and privacy
- cannot control downtime
Types
- private cloud (VMware)
- public cloud (Microsoft Azure, Google App Engine, Amazon EC2)
- hybrid cloud
Amazon EC2
Elastic Compute Cloud (EC2)
EC2 allows scalable deployment of applications by providing a Web service through which a user can boot an Amazon Machine Image to create a virtual machine, which Amazon calls an “instance”, containing any software desired. A user can create, launch, and terminate server instances as needed, paying by the hour for active servers, hence the term “elastic”.
Launch an instance (Ubuntu linux)
Step 1, go to http://aws.amazon.com, sign into your account and then open EC2 dashboard. Launch an instance.
Step 2, Select the Ubuntu Server 16.04 image.
Step 3, Use t2.micro as instance, which is free tier eligible. Click next instead of launch.
Step 4, Jump to security group setup. You need to add 2 more TCP ports: 80, 8080.
Step 5, Click Launch, you will be asked to create a new key pair and download the private key. You can name it as mykey.pem
Connect to the instance
Mac
Open your terminal, run:1
2chmod 600 ~/Downloads/mykey.pem
ssh -i ~/Downloads/mykey.pem ubuntu@YOUR_INSTANCE_IP
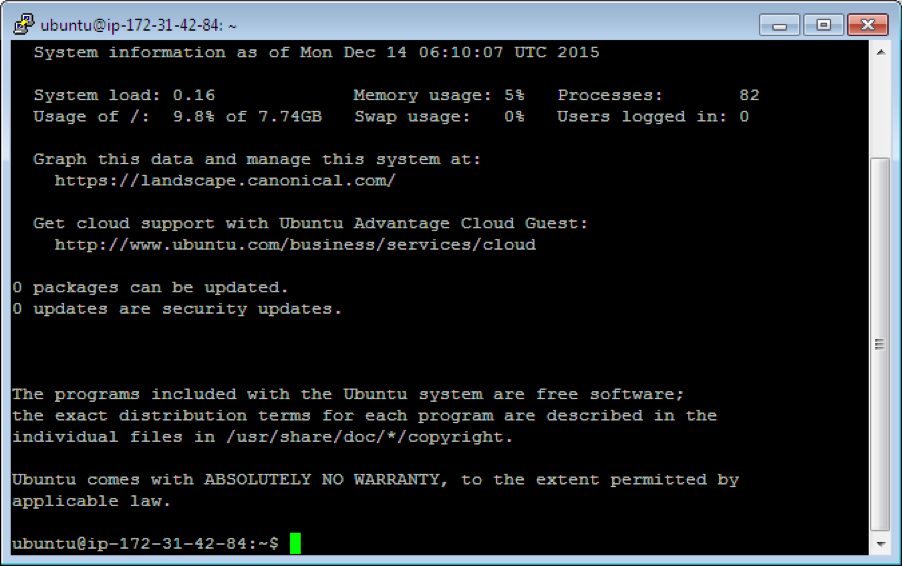
if asked “Are you sure you want to continue connecting (yes/no)? ”, type “yes”, enter.
You are now on the remote server, you can play with Linux commands. hostname, ifconfig, whoami, uptime, pwd, ls
Windows
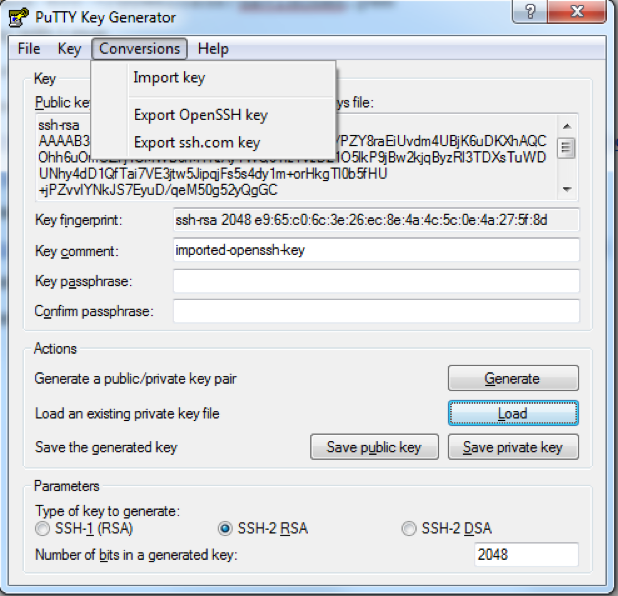
Windows (Putty)
Download Putty and Puttygen from https://the.earth.li/~sgtatham/putty/latest/x86/putty.zip
Open Puttygen, “Conversions”->”Import key”, select mykey.pem file, Save private key as mykey.ppk
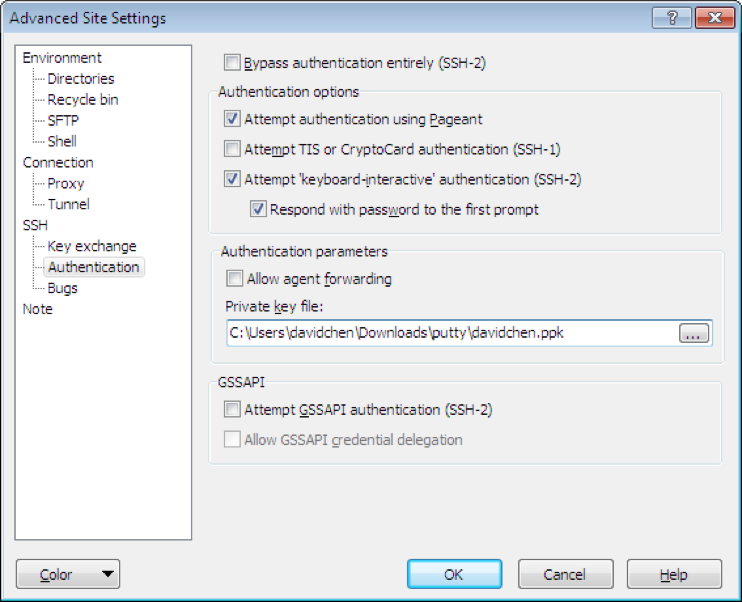
- Open Putty, enter host ip, in SSH->Auth, choose your ppk file
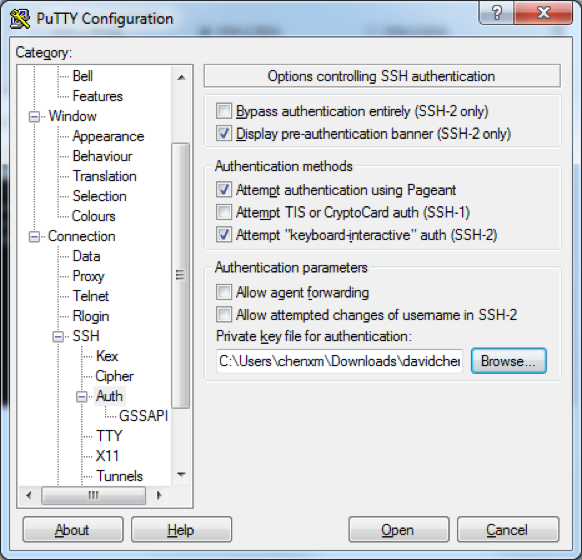
- Click Open, enter the username ubuntu
Install Java
Step 1, In your instance’s terminal, execute the following commands:
- sudo apt-get update
- sudo apt-get install default-jre
Step 2, You can verify with
- java -version
Install MySQL
Step 1, sudo apt-get install mysql-server. When you are asked for new mysql password, use “root”.
Step 2, after installation, type mysql -u root -p in your terminal, then input the “root” as password.
Step 3, In the mysql shell, paste the following SQL statements to install the tables:
1 | DROP DATABASE IF EXISTS myproject; |
Step 4, Type “exit” to quit mysql shell.
Install Tomcat 9
Step 1, Execute the following commands1
2
3
4
5
6
7
8cd /opt/
sudo wget http://apache.mirrors.hoobly.com/tomcat/tomcat-9/v9.0.19/bin/apache-tomcat-9.0.19.tar.gz
sudo tar xzf apache-tomcat-9.0.8.tar.gz
sudo ln -s apache-tomcat-9.0.8 tomcat
echo "export CATALINA_HOME=\"/opt/tomcat\"" >> ~/.bashrc
source ~/.bashrc
cd /opt/tomcat
sudo bin/startup.sh
Step 2, Verify with http://YOUR_INSTANCE_IP:8080/
Run Jupiter on EC2
WAR file (or Web application ARchive) is a JAR file used to distribute a collection of JavaServer Pages, Java Servlets, Java classes, XML files, tag libraries, static web pages (HTML and related files) and other resources that together constitute a web application.
Step 1, Open Eclipse and MAMP, verify your website works correctly on local environment:
http://localhost:8080/Jupiter/
Step 2, open your MySQLDBUtil.java, change and make sure port is 3306, and username and password are root.
3306 is default port in MySQL
Step 3, In Eclipse, select File -> Export -> Web->war File, save the war file to disk.
Step 4, Copy the war file to your instance.
MAC:
Open a new terminal window and type:1
scp -i ~/Downloads/mykey.pem ~/Downloads/Jupiter.war ubuntu@YOUR_INSTANCE_IP:~/
Windows (MSYS2):
1 | scp -i /c/Users/<YOUR_USERNAME>/Downloads/mykey.pem /c/Users/<YOUR_PATH>/Jupiter.war ubuntu@YOUR_INSTANCE_IP:~/ |
Windows (putty):
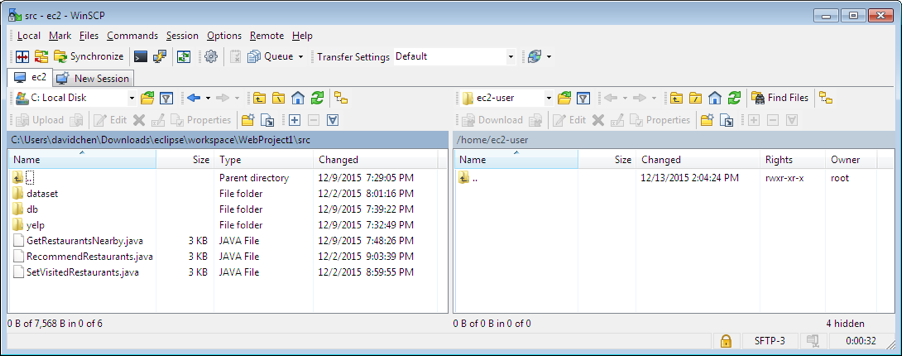
use WinSCP, https://winscp.net/download/WinSCP-5.13.2-Setup.exe
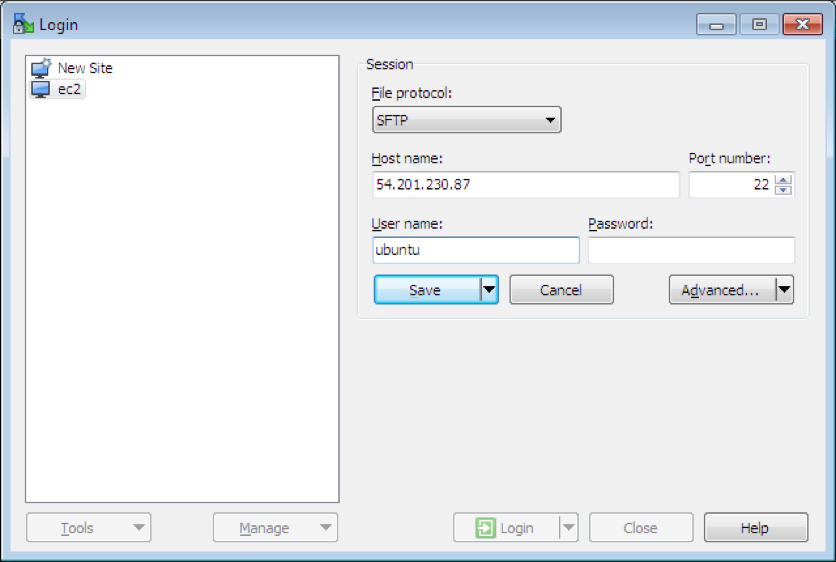
Click Advanced->SSH->Authentication->Private key file: choose *.ppk
Drag the Jupiter.war to the left (into /home/ubuntu/).
Step 5, Both Mac and Windows, back to your terminal/putty, type the following command
1 | sudo cp ~/Jupiter.war /opt/tomcat/webapps/ |
Step 6, Wait for a few seconds, then you can verify the server on your browser:
http://YOUR_INSTANCE_IP:8080/Jupiter/
Redeploy application: redo step 3-5.
Debug configuration
此处需要将eclipse的jdk jre compiler全部设为1.8并重新编译,即可解决版本问题。
(optional) Change the HTTP port from 8080 to 80
Step 1, On the remote command-line terminal, edit the tomcat configuration by:
1 | sudo vim /opt/tomcat/conf/server.xml |
Step 2, Press i to enter edit mode, scroll down to find the following line (around line 69):
1 | <Connector port="8080" protocol="HTTP/1.1" |
Step 3, Press ESC to exit edit mode, then type :wq to save and exit.
Step 4, Restart tomcat by:
1 | sudo /opt/tomcat/bin/shutdown.sh |
Step 5, Visit http://YOUR_IP_ADDRESS/Jupiter/ to see if the server is started correctly.
此处端口设为80,以后访问时就不需要再额外输入端口号了
(optional) Make tomcat auto start when Linux boots
Step 1, On you instance’s terminal, type the following command:
1 | sudo vim /etc/init.d/tomcat |
Step 2, Press i to enter the INSERT mode, then paste the following contents:
1 |
|
Step 3, Press Esc to exit INSERT mode, then type :wq to save and quit.
Step 4, Make the new file executable:
1 | sudo chmod +x /etc/init.d/tomcat |
Step 5, update bashrc to catch your script:
1 | sudo update-rc.d tomcat defaults |
Step 6, (optional) you can use sudo /etc/init.d/tomcat restart to manually restart tomcat.
(optional) Make tomcat auto restart everyday
Your web app may be not that stable to run for months. You can restart it every night to keep it healthy.
Step 1, On you instance’s terminal, type the following command:
1 | sudo crontab -e |
Step 2, Input 3 to select vim.basic as the editor
Step 3, Move the cursor to the end, press i to enter edit mode. Input the following, It means restart tomcat at 1:00 and 13:00 UTC everyday.:
1 | 0 1,13 * * * sudo /etc/init.d/tomcat restart |
定时在1:00和13:00tomcat重启
Step 4, Press Esc to exit INSERT mode, then type :wq to save and quit.
Remote debug:
You can check Java error from Tomcat runtime log. Location:
1 | /opt/tomcat/logs/localhost.<date>.log |
- Check tomcat process:
ps aux|grep tomcat
1 | root 17273 78.3 7.9 2225932 80404 pts/0 Sl 20:30 0:02 /usr/bin/java -Djava.util.logging.config.file=/opt/tomcat/conf/logging.properties -Djava.util.logging.manager=org.apache.juli.ClassLoaderLogManager -Djdk.tls.ephemeralDHKeySize=2048 -Djava.protocol.handler.pkgs=org.apache.catalina.webresources -Dorg.apache.catalina.security.SecurityListener.UMASK=0027 -Dignore.endorsed.dirs= -classpath /opt/tomcat/bin/bootstrap.jar:/opt/tomcat/bin/tomcat-juli.jar -Dcatalina.base=/opt/tomcat -Dcatalina.home=/opt/tomcat -Djava.io.tmpdir=/opt/tomcat/temp org.apache.catalina.startup.Bootstrap start |
17273 is the process id
- To kill the process
1 | Sudo kill -9 17273 |